Saturday 24 September 2011

The cavalry's coming, I hope you brought your goggles...

With the advent of War in the desert comes dust clouds, they give concealment to anyone targeted through them (+1 to hit).  
With every move by a vehicle over 4”-12"a medium base sized amount of dust is produced and a marker is placed immediately behind said vehicle and any move over 12” or part thereof, another is produced. My new army can lay out with it's 24 tanks and 3 armoured cars their own dust storm,
A9 2x2 = 4 markers (tank 12” move, doubles 24”) Unreliable
A10 3x2 = 6 markers (slow tank 8” move, doubles 16”) Unreliable
A13 8x3 = 24 markers (tank 12” move fast tank doubles 32”) Unreliable
Mk VI 14x3 =42 markers (half tracked vehicle on hard desert 16” move, doubles 32”)
AC 3x3 = 9 markers (wheeled vehicles on hard desert 16” move, doubles 32”)
So that's potentially 85 markers, a lot of dust. However i'm not likely to ever need that many, all those unreliable tanks breaking down without a recovery vehicles isn't a good idea, as I found out in the two games i've played with them. 


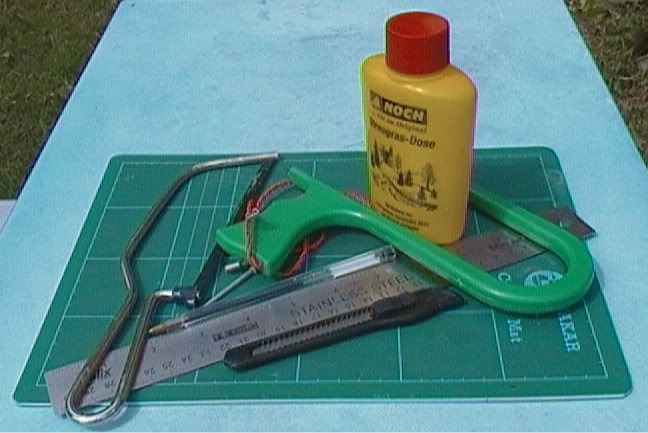
I wasn't going to do a “how to” as BF have done two, one you can find on their site and the other in “Hellfire and back” I thought i'd kind of document it all the same. No pre-painted pictures i'm afraid, I didn't think about pics or documenting until i'd started painting, so there's a little blurb below. The HF&B “how to” is spot on the only part I found difficult was using straight white paint on a naturally occurring item, but I got over it (sort of).


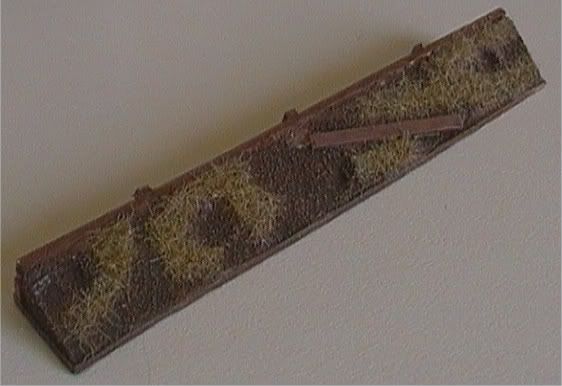
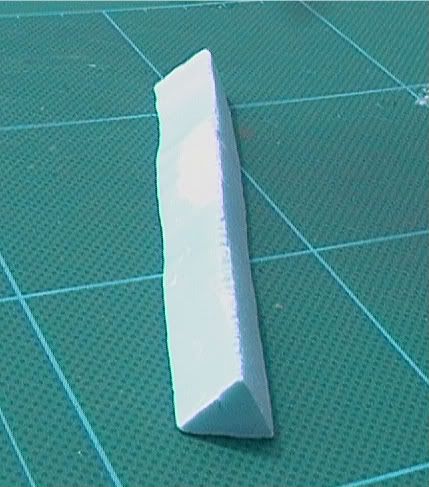
First off, bases, I picked up a load of the mdf medium size bases from Ebay and as I read somewhere, they are easier to pick up (literally) than the official BF ones, cheaper too. Poundshop pre-mix plaster, this plaster is going to form the (for want of a better term) base of the base ie: the desert floor, so it makes up part of the visual, instead of being hidden under static grass, I prefer to use the cheap stuff it gives a grittier texture, the posh stuff gives a smoother feel and quick drying but this isn't what we need on this occasion. I picked up a basing tip recently, when first applying the plaster, dip the tool you're using in the water and use this to smooth out a thin layer, then add the rest, the watered down layer helps the bulk of the plaster adhere to the base, rather than it lifting off as you're sculpting. Once you've got a decent covering lightly drag the edge of the tool you're using over it, this helps to lift it a little and gives a more realistic surface and something the drybrushing during painting can pick up later. Then I added a few stones and other bits of balast just to break it up, glued down with a layer of PVA.

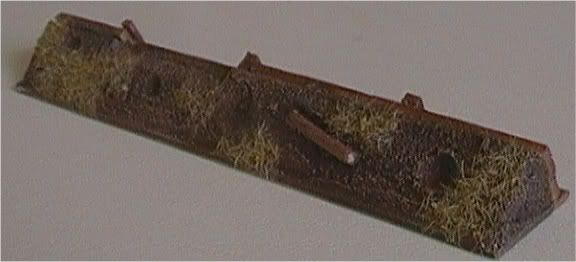
Painting sequence, basecoat English Uniform, 2 x light drybrush of desert yellow, drybrush buff, stones painted with a 50/50 mix of buff/white followed by a final highlight of white (shudder). Then a layer of matt varnish.


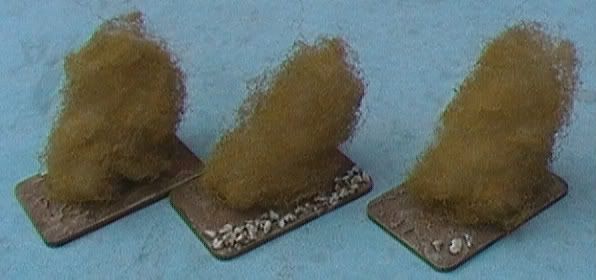
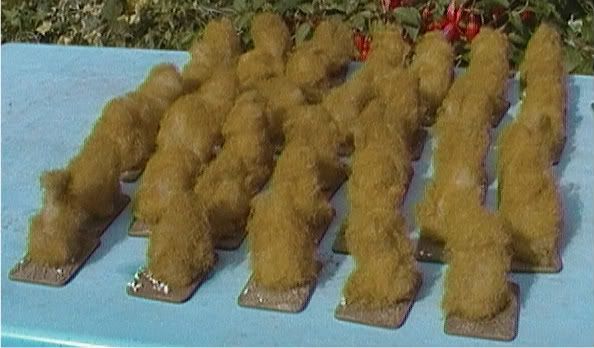
Teddy bear fluff Ebay £3.00 for 250gms (I probably won't ever need anymore of this, I barely touched it, unless I take up making teddy bears, although I need some more smoke markers, and I will make some Neb launching markers eventually), so you pull out what you need (use the photos for reference) it's then sprayed with War Paint's mid/late war Dunkelgelb code: SP04 this is the fun bit when the paint starts to dry out on your latex gloves and the fluff sticks to them, I am now a master at fluff tossing (ooer missus), once dry glue it down with pva to the bases weighted down with something not to heavy, I used the mainstay of the cutlery draw to stop the fluff from lifting off while dying. I forgot there's supposed to be a drybrush of buff on the fluff after drying, but i think they look pretty cool as is. And there you have it 40 dust cloud markers.


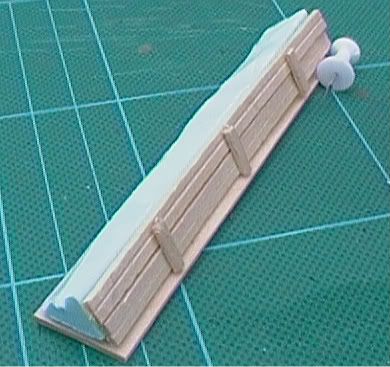
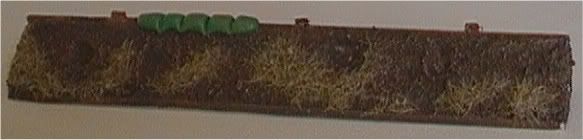
Sneak preview of the Mk VI sand guard conversion "how to".

Sunday 18 September 2011

Stugs in Normandy.

Here's my first forray into painting armour, as i understand it this type of camo got more of a showing in Italy, but camo wasn't limited to a theatre, with movement taking place back and fourth, paint availability, a general leaving it up to the tankers for camo style meant that variation was the norm rather than exception. And having no air compressor, helped in my decision. :)


I wanted to model them on the Fallschirm-Sturmgeschutz-Brigade 12 but then realised the points would bust my 1750 army, also the 12th had stug IV's Saukopf mantel and not the Stug III g's that i have (from the "open fire" box set), in my studies i've found that the III g's tankers started to add a guard to the top of there guns as detritus that fell into the gap would stop the gun being traversed so high. So i wanted to convert, but never got the chance, i'd like to in the future and if the idea inspires anyone i think it'd be great to make them your own.


I've posted some of these pics up on the Flames site, but thought i could get away with a few more here (although the group shots are a bit small), i hope you like them, i certainly do. 


"the camo covers a multitude of broken shurzen sins"


And last but not least, nice rear ;)


Sunday 4 September 2011

Result, not the lottery though.

I got two numbers on the lottery, not even a tenner eh. However i am a winner, a little while back the guys over at modeldads ran a competition for a new decal sheet for late war Normandy, they'll be producing it along with mustang games , and as a result (i think by default) i've won a copy of the new sheet. Which as it happens has landed at the right time, i recently bought myself some barbed wire from antenocitis and have been meaning to make some minefield and barbwire markers, the decal sheet includes some german mine warning signs. I'll also be able to use the St. Lo sign for a Fallschirmjager command stand. The road signs would probably look awesome on a well camouflaged pak40 poking it's nose down a sunken bocage lane, i do need some objectives, damn you modeldads and your inspiring ways.
Anyroad i've got enough projects to be going on with.
Cheers Modeldads.

Wednesday 24 August 2011

Early War get's a look in.

In a change from the previously advertised products, i'm going to do a little conversion "how to" in the near future on the British armoured regiment as they're off to North Africa, i'll be adding some sand guards, messing around with Besa m.g.s. and maybe casting some turret slopes coverting the A13 Mark IIIs to Mark IVa's however if anyone wants to swap 5 for 5 turrets i'd be more than happy or if anyones got any extras floating around (I don't have a copy of HF&B yet, so i'm not sure of the exact layout of my company). I was lucky enough to pick up the BAR box set 2nd hand for £50 from a member of our local.
 
It'll be a complete change for me, from playing infantry late war my awesome (not so fearless, depending on my dice) fallschirmjager compared to the mightily armoured BAR depending on Cruiser type Front armour 2/1 side 2/1/0 top 1 tank/cavalry regiment i can't wait til they meet an 88 or even harsh language, gives me the shivers. What more can i say Tally Ho!

Sunday 21 August 2011

In the trenches.

So here goes, my first "how to" excuse the waffle hopefully i can hone it in future? If you can work your way through, you should be able to get your infantry a safer haven. More foxes than hare.


First to the basics.
Materials:
10mm styrofoam sheet. (free from work, although Antenocitti supply a A4 sheet £1.00 odd)
18/20mm Lollipop sticks. Amazon (£2.50 for 50)
Coffee stirers, thin & fat. Free from your local coffee shop.
PVA glue. Poundshop.
Filler. As above.
Modelling sand. (fine sandpit sand seems to work well, someday the kids'll forgive me...freeish, although i bought it in the first place)
If you can find them the odd 15mm crates and oil drums. (£?)
Greenstuff. For modelling sand bags. (pricey stuff but well worth it)
Various Paints for soil and wood. Ranging in price, although i bought some art shop cheap bottled acrylics, £2.15 a bottle, saved my Vallejo, german camo black/brown.


Equipment:
Something to cut the styrofoam hot wire cutter (£7.10 including P & P) or junior hacksaw (£0.75p-£1.00).
Glasspaper. Poundshop (mmm the smell of bone glue)
Metal ruler. (can't remember)
Pen (freeish)
Scalpel (freeish)
4/5 by 40mm or similar scriber. (£0.03p)


I started by cutting out the styrofoam, making sure I could get this right first, things to remember about these trenches is they're based on german trenches a friend Safety Markings reliably informed me that the germans angled there trenches at about 90ยบ to aid with water run off and floored them with planks, this aided in the war against trenchfoot and generally in keeping things drier. This is of use to us as we can use the whole of the width of the lollipop sticks .

Pre hotwire cutter i used a junior hacksaw to cut them into shape, it worked out well, however I only cut one of the trench pieces out (I'm not sure how long the blade would stay sharp, when cutting 8ft's worth) and as you can find them in the poundshop or local supermarket for less than or a quid, it's a cheaper option than the cutter, however if you're going to produce a lot of terrain/models from styrofoam investing in your own cutter is going to be your best bet (or have a mate you could "borrow" it off ;).

So the styrofoam needs to be cut into 4 inch lengths 11mm deep by 10mm high this is main trench wall try and get this as flat as possible with the glasspaper (safety time this will produce a lot of fine dust, so get on your dust mask time, i did this into a plastic bag, which saves on time clearing up). 


Trim the lollipop sticks to a 4 inch length (official trench piece length is 8 inches, but comes supplied at), then glue the styrofoam bank to the front of the stick with the PVA glue.

Now's time to cut the coffee stirrers to the correct length (if you've got the thicker ones, these'll do, try and save the thinner ones for the upright posts), once again 4 inches, it's time to start thinking about whether you're gonna have any missing planks lining the edge of your trench, if so you can cut these as you go. Now take the sciber/nail you are going to use as a scribe, to mark your notch along the length of the stirrer, so rather than cutting and gluing the stirrer to represent planks you are marking it too represent the look, saving time and effort, get a deep enough recess to hold a decent ink wash.

Once the sloped bank has dried in place take two of the cut down and marked stirrers and glue these to the main trench wall (10mm one) these should be a good fit, they can and have probably warped, so try and get them as flat as possible before gluing. Take some of the thinner stirrers and cut yourself some uprights (posts) these'll be 2.5mm by 10mm high and glue these into place, i've glued three along the length of the trench, I now think that maybe four would be more suitable at this scale.


So you now have your naked trench, take some premix filler (available in most good quality poundshops) and fill those gaps where the stirrers have warped or didn't quite meet the bank. Once dried it's time to spruce it up, you can carve yourself some craters using the rounded end of the stirrers for smaller craters and same again with the lollipop sticks. Take the odd cut down plank push this into place on the front slope, remove then glue in place. If you can find them, the odd crate or oil drum scattered around using the same process as the plank, if you can track some down as the ones i'd got weren't big enough (N gauge is not 15mm), could you drop me a line? Sandbags from greenstuff are a good addition, i've done this on a few of the trenches but haven't got round to painting them yet. I think if you're going to head down the filler route for texture rather than sand on the front of the bank, you'd be better off applying this before the detritus. So PVA to hand, spread across the banks, then sprinkle on the sand.


Once dried it's painting time, the inside of the trenches with a suitable wood colour, i was originally going to paint these as i would a figure, highlighting as i go, i then realised 10 ft's worth would take a little time and probably a lot of sanity (and that's in short supply), so dry brushing time it was, same process again with the soil/sand your colours are going to depend on theatre, Normandy, Sevastopol, Italy and with the advent of Hellfire and Back, North Africa too.


I hope that wasn't to painful and hasn't put you off modelling for life!

TT.


Monday 13 June 2011

Here's my first foray into scratchbuilding (and blogging) it came about after reading the Modeldads website and Harveys "how to"s, the basic tenet being produce these m.g. nests in two hours, i got close-ish, also they're cheap an being the frugal chap that i am i thought i'd give it a go, ofcourse a general love of modelling helped and the fact that Harvey said they were easy to make, inspired me to pick up the scalpel. I'm proud of the way they turned out and after the author gave me the thumbs up, what more could i ask for.
They'll be a useful addition to any of the fortifications missions in Flames of War. And with the advent of the 2nd Fallschirmjager list from "Earth and Steel" Battlefront's latest compilation book on axis forces in Normandy, i can take them as a field fortification along with plenty of different types of defences be they field or coastal.
Nests (without)

Nests (with)
Apologies for the quality (looming shadow) of the pics, i will be getting a light box at some stage...
As Harvey's "how to"s are already out there, i thought i'd let them speak for themselves you could always pop over to Modeldads and take a look for yourself and why not have a browse too, it's always worth a look.
I'm currently working on 8ft of trenchlines as somewhere for my jager to defend and a couple of AT bunkers to shore things up, more on them later. So watch this space in the future for a breakdown on their construction, and hopefully one or two "how to"s of my own..

Wednesday 8 June 2011