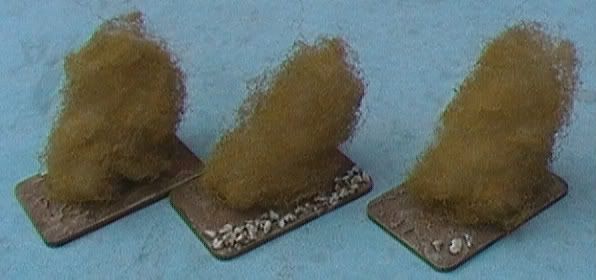
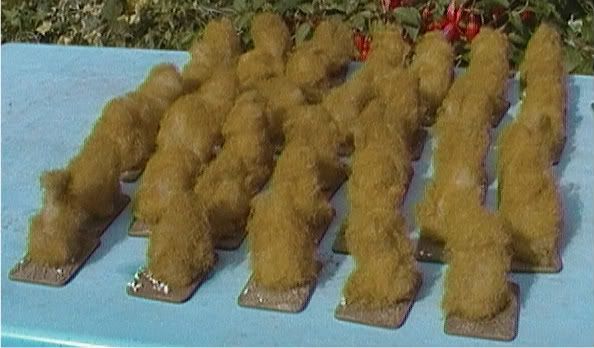
With the advent of War in the desert comes dust clouds, they give concealment to anyone targeted through them (+1 to hit).
With every move by a vehicle over 4”-12"a medium base sized amount of dust is produced and a marker is placed immediately behind said vehicle and any move over 12” or part thereof, another is produced. My new army can lay out with it's 24 tanks and 3 armoured cars their own dust storm,
A9 2x2 = 4 markers (tank 12” move, doubles 24”) Unreliable
A10 3x2 = 6 markers (slow tank 8” move, doubles 16”) Unreliable
A13 8x3 = 24 markers (tank 12” move fast tank doubles 32”) Unreliable
Mk VI 14x3 =42 markers (half tracked vehicle on hard desert 16” move, doubles 32”)
AC 3x3 = 9 markers (wheeled vehicles on hard desert 16” move, doubles 32”)
So that's potentially 85 markers, a lot of dust. However i'm not likely to ever need that many, all those unreliable tanks breaking down without a recovery vehicles isn't a good idea, as I found out in the two games i've played with them.
I wasn't going to do a “how to” as BF have done two, one you can find on their site and the other in “Hellfire and back” I thought i'd kind of document it all the same. No pre-painted pictures i'm afraid, I didn't think about pics or documenting until i'd started painting, so there's a little blurb below. The HF&B “how to” is spot on the only part I found difficult was using straight white paint on a naturally occurring item, but I got over it (sort of).
First off, bases, I picked up a load of the mdf medium size bases from Ebay and as I read somewhere, they are easier to pick up (literally) than the official BF ones, cheaper too. Poundshop pre-mix plaster, this plaster is going to form the (for want of a better term) base of the base ie: the desert floor, so it makes up part of the visual, instead of being hidden under static grass, I prefer to use the cheap stuff it gives a grittier texture, the posh stuff gives a smoother feel and quick drying but this isn't what we need on this occasion. I picked up a basing tip recently, when first applying the plaster, dip the tool you're using in the water and use this to smooth out a thin layer, then add the rest, the watered down layer helps the bulk of the plaster adhere to the base, rather than it lifting off as you're sculpting. Once you've got a decent covering lightly drag the edge of the tool you're using over it, this helps to lift it a little and gives a more realistic surface and something the drybrushing during painting can pick up later. Then I added a few stones and other bits of balast just to break it up, glued down with a layer of PVA.
Painting sequence, basecoat English Uniform, 2 x light drybrush of desert yellow, drybrush buff, stones painted with a 50/50 mix of buff/white followed by a final highlight of white (shudder). Then a layer of matt varnish.
Teddy bear fluff Ebay £3.00 for 250gms (I probably won't ever need anymore of this, I barely touched it, unless I take up making teddy bears, although I need some more smoke markers, and I will make some Neb launching markers eventually), so you pull out what you need (use the photos for reference) it's then sprayed with War Paint's mid/late war Dunkelgelb code: SP04 this is the fun bit when the paint starts to dry out on your latex gloves and the fluff sticks to them, I am now a master at fluff tossing (ooer missus), once dry glue it down with pva to the bases weighted down with something not to heavy, I used the mainstay of the cutlery draw to stop the fluff from lifting off while dying. I forgot there's supposed to be a drybrush of buff on the fluff after drying, but i think they look pretty cool as is. And there you have it 40 dust cloud markers.


All you need now is some tanks to kick it all up!
ReplyDeleteVery nice Si, I think the rocks came out looking well, not too bright on the background.
Hi Joel.
ReplyDeleteI think hobbywise our blogs are at different ends of our collective spectrum. Yours being RC stuff and mine being aimed at the wargamer. So at this stage i'm sorry to say i'll have to decline, but thanks for the offer. Good luck with the blog. TT
And pointing out my lack of email, cheers.
ReplyDeleteTT
You've done a lot more with details than I have! Looks good. :)
ReplyDelete