So here goes, my first "how to" excuse the waffle hopefully i can hone it in future? If you can work your way through, you should be able to get your infantry a safer haven. More foxes than hare.
First to the basics.
Materials:
10mm styrofoam sheet. (free from work, although Antenocitti supply a A4 sheet £1.00 odd)
18/20mm Lollipop sticks. Amazon (£2.50 for 50)
Coffee stirers, thin & fat. Free from your local coffee shop.
PVA glue. Poundshop.
Filler. As above.
Modelling sand. (fine sandpit sand seems to work well, someday the kids'll forgive me...freeish, although i bought it in the first place)
If you can find them the odd 15mm crates and oil drums. (£?)
Greenstuff. For modelling sand bags. (pricey stuff but well worth it)
Various Paints for soil and wood. Ranging in price, although i bought some art shop cheap bottled acrylics, £2.15 a bottle, saved my Vallejo, german camo black/brown.
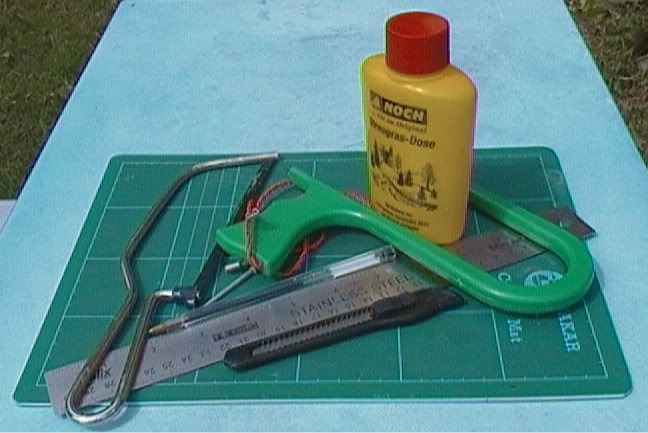
Equipment:
Something to cut the styrofoam hot wire cutter (£7.10 including P & P) or junior hacksaw (£0.75p-£1.00).
Glasspaper. Poundshop (mmm the smell of bone glue)
Metal ruler. (can't remember)
Pen (freeish)
Scalpel (freeish)
4/5 by 40mm or similar scriber. (£0.03p)
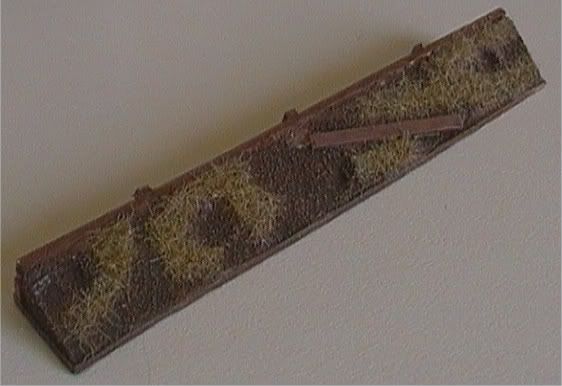
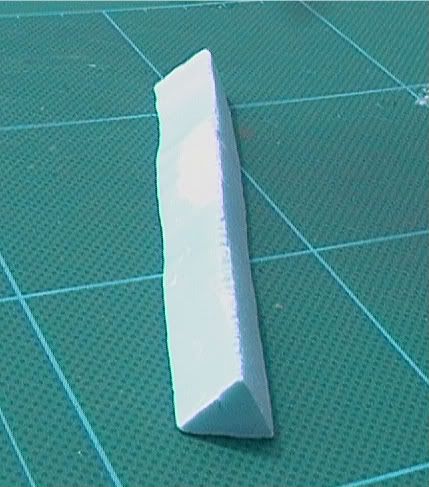
I started by cutting out the styrofoam, making sure I could get this right first, things to remember about these trenches is they're based on german trenches a friend Safety Markings reliably informed me that the germans angled there trenches at about 90º to aid with water run off and floored them with planks, this aided in the war against trenchfoot and generally in keeping things drier. This is of use to us as we can use the whole of the width of the lollipop sticks .
Pre hotwire cutter i used a junior hacksaw to cut them into shape, it worked out well, however I only cut one of the trench pieces out (I'm not sure how long the blade would stay sharp, when cutting 8ft's worth) and as you can find them in the poundshop or local supermarket for less than or a quid, it's a cheaper option than the cutter, however if you're going to produce a lot of terrain/models from styrofoam investing in your own cutter is going to be your best bet (or have a mate you could "borrow" it off ;).
So the styrofoam needs to be cut into 4 inch lengths 11mm deep by 10mm high this is main trench wall try and get this as flat as possible with the glasspaper (safety time this will produce a lot of fine dust, so get on your dust mask time, i did this into a plastic bag, which saves on time clearing up).
Trim the lollipop sticks to a 4 inch length (official trench piece length is 8 inches, but comes supplied at), then glue the styrofoam bank to the front of the stick with the PVA glue.
Now's time to cut the coffee stirrers to the correct length (if you've got the thicker ones, these'll do, try and save the thinner ones for the upright posts), once again 4 inches, it's time to start thinking about whether you're gonna have any missing planks lining the edge of your trench, if so you can cut these as you go. Now take the sciber/nail you are going to use as a scribe, to mark your notch along the length of the stirrer, so rather than cutting and gluing the stirrer to represent planks you are marking it too represent the look, saving time and effort, get a deep enough recess to hold a decent ink wash.
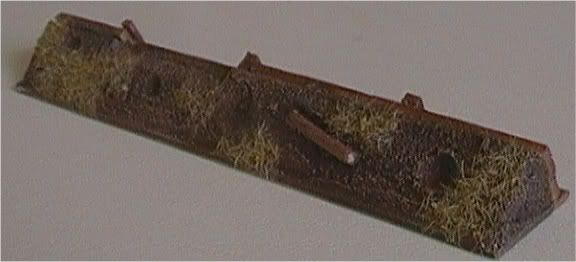
Once the sloped bank has dried in place take two of the cut down and marked stirrers and glue these to the main trench wall (10mm one) these should be a good fit, they can and have probably warped, so try and get them as flat as possible before gluing. Take some of the thinner stirrers and cut yourself some uprights (posts) these'll be 2.5mm by 10mm high and glue these into place, i've glued three along the length of the trench, I now think that maybe four would be more suitable at this scale.
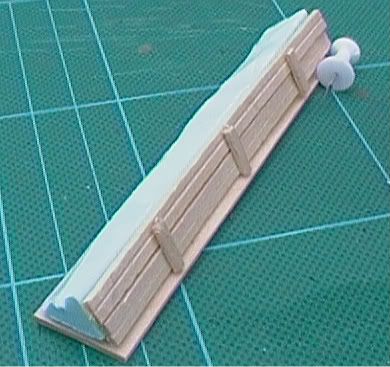
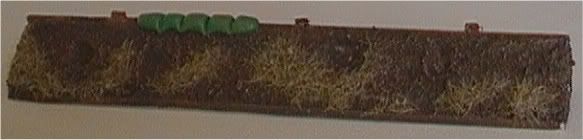
So you now have your naked trench, take some premix filler (available in most good quality poundshops) and fill those gaps where the stirrers have warped or didn't quite meet the bank. Once dried it's time to spruce it up, you can carve yourself some craters using the rounded end of the stirrers for smaller craters and same again with the lollipop sticks. Take the odd cut down plank push this into place on the front slope, remove then glue in place. If you can find them, the odd crate or oil drum scattered around using the same process as the plank, if you can track some down as the ones i'd got weren't big enough (N gauge is not 15mm), could you drop me a line? Sandbags from greenstuff are a good addition, i've done this on a few of the trenches but haven't got round to painting them yet. I think if you're going to head down the filler route for texture rather than sand on the front of the bank, you'd be better off applying this before the detritus. So PVA to hand, spread across the banks, then sprinkle on the sand.

Once dried it's painting time, the inside of the trenches with a suitable wood colour, i was originally going to paint these as i would a figure, highlighting as i go, i then realised 10 ft's worth would take a little time and probably a lot of sanity (and that's in short supply), so dry brushing time it was, same process again with the soil/sand your colours are going to depend on theatre, Normandy, Sevastopol, Italy and with the advent of Hellfire and Back, North Africa too.
I hope that wasn't to painful and hasn't put you off modelling for life!
TT.

Loving the finish on these earthworks, would look good on any table.
ReplyDeleteChris from Model Dads
This comment has been removed by the author.
ReplyDeleteCheers Chris, probably wouldn't be here without you, Justin and SafetyStick.
ReplyDelete